I have been brewing on a set of abstract game ideas for years… But the ideas never converged into a game that made sense in its entirety and could be fun. So, each attempt ended as most projects in the world do: abandoned. Last year, however, I got some new insights – probably stole them somewhere – that filled quite some gaps… So, I started another try.
A short introduction: Archon is a client-server, multi-player coop action RPG (Diablo, Torchlight, Grim Dawn) in which the player pilots a modular spaceship, a spacestation and walks on planet surfaces. Like in an RPG there is loot received from combat or exploration. Loot comes in the form of ship-modules that also physically define the shape of your ship (think Reassembly, but simplified to be less time consuming) .
Lore-wise, you are a remote alien conscience that, using advanced technology, is capable of mind controlling lesser aliens at distant locations. Using these controlled beings, you build several kinds of starships and starbases and fight increasingly difficult adversaries while taking advantage of the hard work done by alien communities you encounter around the universe… And of course, “Home” isn’t happy with your godly profiteering, either…
After 5 months of development, the following is up and running:
client-server multiplayer: this was by far the hardest part. It works by recording the entire gameworld as animation keyframes on timelines, very similar to what Flash and most 3D modelling software use for animating. These keyframes are then immediately streamed to the players’ computers so they can run the part of the gameworld that is visible on their screen.
Modular ships that exist of physical modules glued onto each other (guns, thrusters, cockpit).
A vector graphics engine that draws 2D polygons instead of the more common sprite-based graphics. This was essential because the game is mostly based on procedurally generated graphics (modular ships, stations and planets). It also allows for the graphics to stay crisp at any resolution or gameworld-zoom amount.
I want this game to be highly mod-able, so the game engine reads almost everything from files (json). Non-procedural graphics are read directly from SVG-files that are editable in most vector art applications.
A particle system for thruster exhausts, explosions, etc. My stress testing went up to 150.000 moving particles, which still ran fine on my machine. More than enough…
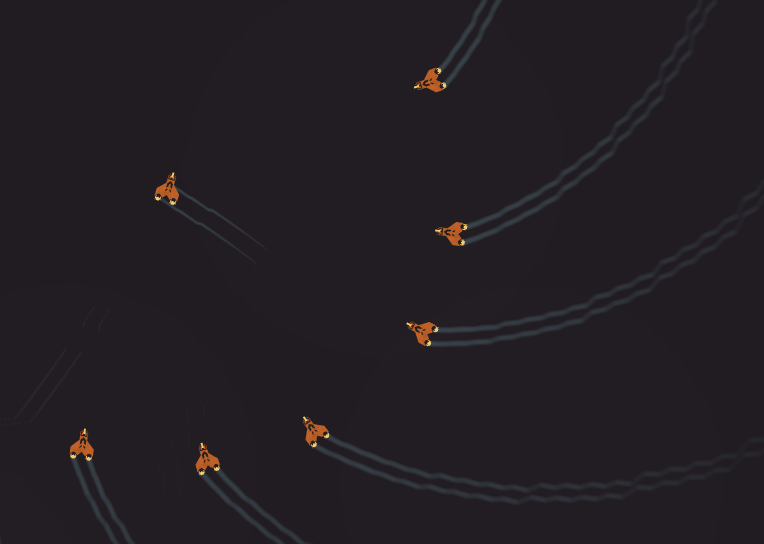
Multiple connected players can currently pilot a ship, shoot and hit ships from other factions (although there is no visualization on that yet). The server can control AI ships but only to have them follow a loop of waypoints.
An multi-threaded ECS engine (Entity Component System) at the core, driving all of the above.
That’s it.. 20.000 lines of C#.NET code, for … well… this 🙂
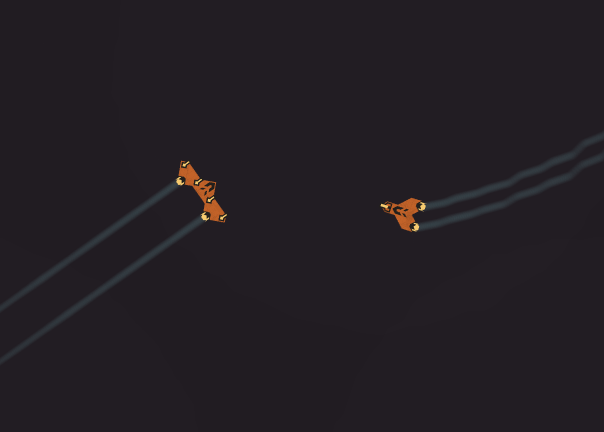
A collection of server-side controlled ships and one controlled by a player. Side, back and frontal thrusters visualize semi-realistic movement in space.2 small ships made from modules
If you are a spoiled Windows brat like me; mostly used to setup wizards and clicking Next buttons in Windows; then getting the Ogre .NET bindings to build is quite the ordeal. So, here is the entire process if you want to use Ogre3D from .NET too.
Beware that understanding what you’re doing is still important as details might vary in future versions of the Ogre sources. This post will give some background information along the way about things that are less obvious to .NET developers, so I hope you will be able to solve any issues that are not explained here.
Thanks to paroj from the Ogre team for repeatedly pointing me towards the next step of this process!
Also note that .NET bindings only exist for Ogre 1.12+ at the moment of writing. Ogre 2 exists, but without bindings. Ogre 2 seems to be mostly about advanced, high performance graphics though, so I guess you should be programming your game with C++ in those cases anyway.
Prerequisites
Visual Studio 2019 Community Edition or better. (2017 should be fine too) Make sure you also added the C++ development features during setup.
CMake: is a tool that takes a platform-agnostic codebase and generates the platform-specific extra files so the codebase can be built by the platform of your choice. We will use this tool to generate the solution and projects so we can build Ogre using Visual Studio. Install it from: https://cmake.org/download/ (pick the latest 64-bit installer)
Ogre sources: the latest version had linker errors for the DotScene component, so I ended up using the 1.12.1 tag, feel free to try a more recent version. Download and extract to c:\ogre3d\ogre-1.12.1: https://github.com/OGRECave/ogre/tree/v1.12.1
Generating the Visual Studio C++ solution
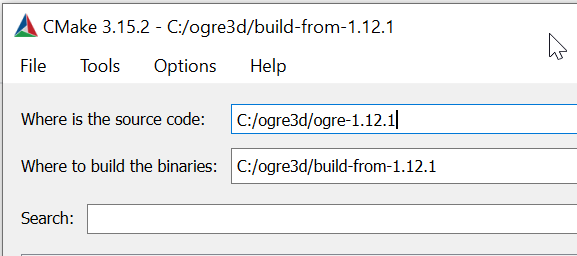
Start CMake (cmake-gui), which should have been installed by the CMake setup earlier.
Enter the location you extracted the Ogre sources to, and a not-yet-existing build output folder.
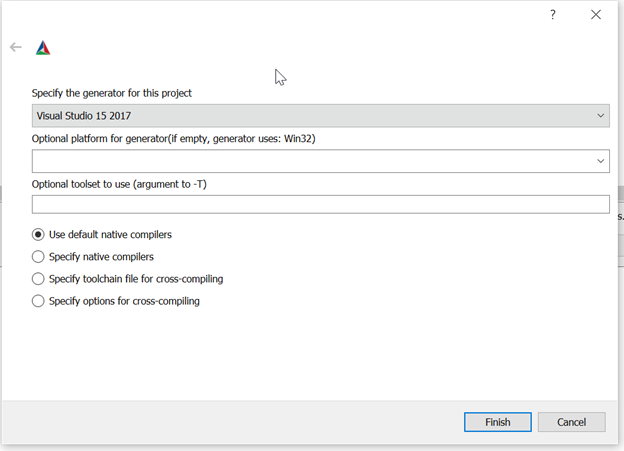
Click Configure and choose the Visual Studio 2017 generator (2019 doesn’t work for Ogre):
Press Finish and let CMake work for a minute.
CMake requires a bit of getting used to: first we have a configuration phase, where you can configure variables and reprocess the changes you make to see what CMake makes of it. You can repeat this process of tweaking and using the Configure button until you’re ready to Generate (= second phase). Variables that are new or have changed in the last Configure-iteration are shown in red, the rest becomes white.
So, after our first Configure press, all variables are red because everything is new. You also find errors in the output about not finding SWIG. So, check the Advanced tickbox in the upper part of CMake to show all config variables and set the SWIG_EXECUTABLE variable to your swig.exe’s full path.
Reverse the Windows backslashes for the Linux originating CMake!
Also enable the CSharp component so the CSharp wrapper code will be generated too:
Press Configure for a new config iteration. Only 2 red lines left: the SWIG_EXECUTABLE variable we just set was used to set the SWIG_DIR, so these two remain red.
Press Configure again… No more red…
Press Generate.
Among many other things, OGRE.sln should now appear in your build output folder: C:\ogre3d\build-from-1.12.1
Building Ogre
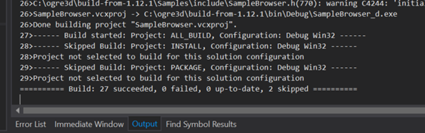
Open the generated OGRE.sln in Visual Studio and build the entire solution (Ctrl+Shift+B)
If the CMake part went well, you should get 0 failed projects in your Output panel:
We now have built the following:
the native Ogre engine binaries (at C:\ogre3d\build-from-1.12.1\bin)
the .NET side’s sources of the bindings (the C# code at C:\ogre3d\build-from-1.12.1\csharp)
the native side’s binaries of the bindings (C:\ogre3d\build-from-1.12.1\ csharp\Debug\lib_ogre_d.*)
Building the .NET bindings .dll
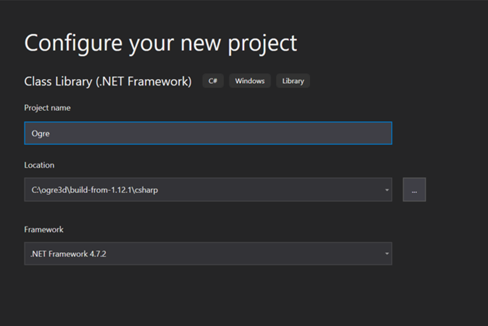
Open a new instance of Visual Studio and create a new Class library (use the .NET Framework variant!):
Go to C:\ogre3d\build-from-1.12.1\csharp , and drag all files (not the directories) onto the project in Visual Studio to include them in the project. (they will be physically copied to the project’s folder too)
Build.
At this point, I received two build errors. I assume that a few mistakes were made in the SWIG configuration by the Ogre team, but the solutions were obvious in my case. If you get different errors, just use your common sense to fix them.
In BillboardChain.cs I had to remove an override keyword, as there was nothing to override:
In SceneManager.cs I had to explicitly set the type of an enum to unsigned int because one of the values exceeded the signed int bounds, which is the implicitly chosen type for enums:
Build… Success! Almost there now…
Building a test app
The framework should now be ready for use. We just need to assemble the binaries and make a little testing app. Paroj pushed code for a small test here, so let’s try and run that now.
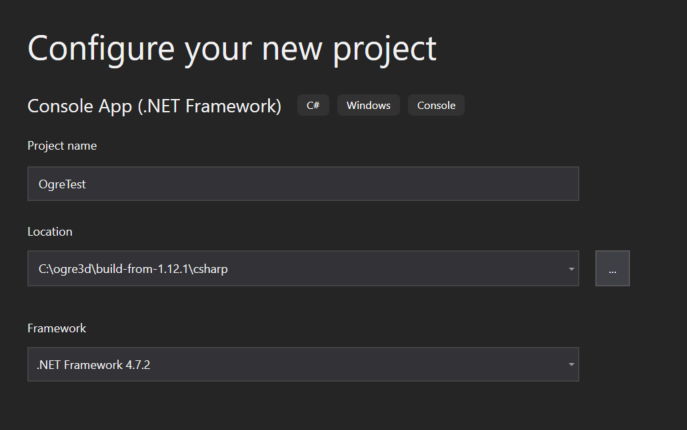
In the C# binding solution, add another project: choose Console (again, .NET Framework!):
Replace the generated content of Program.cs with Paroj’s code:
using org.ogre;

public class KeyListener : InputListener
{
    ApplicationContext ctx;

    public KeyListener(ApplicationContext ctx)
    {
        this.ctx = ctx;
    }

    public override bool keyPressed(KeyboardEvent evt)
    {
        if (evt.keysym.sym == 27)
            ctx.getRoot().queueEndRendering();
        return true;
    }
}

public class Example : ApplicationContext
{
    InputListener listener;

    public Example()
    {
        listener = new KeyListener(this);
    }

    public override void setup()
    {
        base.setup();
        addInputListener(listener);

        var root = getRoot();
        var scnMgr = root.createSceneManager();

        var shadergen = ShaderGenerator.getSingleton();
        shadergen.addSceneManager(scnMgr); // must be done before we do anything with the scene

        scnMgr.setAmbientLight(new ColourValue(.1f, .1f, .1f));

        var light = scnMgr.createLight("MainLight");
        var lightnode = scnMgr.getRootSceneNode().createChildSceneNode();
        lightnode.setPosition(0f, 10f, 15f);
        lightnode.attachObject(light);

        var cam = scnMgr.createCamera("myCam");
        cam.setAutoAspectRatio(true);
        cam.setNearClipDistance(5);
        var camnode = scnMgr.getRootSceneNode().createChildSceneNode();
        camnode.attachObject(cam);

        var camman = new CameraMan(camnode);
        camman.setStyle(CameraStyle.CS_ORBIT);
        camman.setYawPitchDist(new Radian(0), new Radian(0.3f), 15f);
        addInputListener(camman);

        var vp = getRenderWindow().addViewport(cam);
        vp.setBackgroundColour(new ColourValue(.3f, .3f, .3f));

        var ent = scnMgr.createEntity("Sinbad.mesh");
        var node = scnMgr.getRootSceneNode().createChildSceneNode();
        node.attachObject(ent);
    }

    static void Main()
    {
        var app = new Example();
        app.initApp();
        app.getRoot().startRendering();
        app.closeApp();
    }
}
Add a Project reference from the test project to the Ogre bindings project.
Build… Success!
Lastly, we need to add all the binaries from the Ogre framework and the bindings to the bin\debug folder of the test app so that it can find them (eg. C:\ogre3d\build-from-1.12.1\csharp\OgreTest\bin\Debug):
copy all files from C:\ogre3d\build-from-1.12.1\bin\debug
copy all files from C:\ogre3d\build-from-1.12.1\csharp\Debug
For a more robust solution, you should include all essential dlls into the Ogre bindings project in Visual Studio and set their “Copy to Output Directory” to “Copy if newer” in the Properties panel. But I consider that homework 🙂
Mark the OgreTest project as startup project and Press F5:
As the official Arduino IDE is quite limited in features, I tried out some alternatives. I was mostly in search for code completion. I tried PlatformIO in vscode first but apparently some configuration files for the Gamebuino board are not yet available to get it to work, so I tried Visual Studio (which I know very well anyway) and succeeded.
This blogpost runs you through the setup enabling you to program the Gamebuino Meta in Visual Studio 2019 and its rich IDE featureset (including code completion 🙂 ). This solution uses free software.
Configure the Arduino IDE
We first need to setup the regular solution as if we were going to program the GameBuino Meta using the official Arduino IDE.
The gist is that you have installed the 2 board packages and 1 library package.
A Board is a package of info for the Arduino compiler so it can compile our C++ programs into the specific binary format that the Gamebuino Meta hardware understands.
A Library contains a large amount of C++ code written by other people for us, so we don’t have to reinvent the wheel for common tasks you want the Gamebuino Meta to do: draw things on the screen, play sounds, etc.
You can try compiling this Gamebuino Meta sample to see if it works:
To try if this compiles correctly, press the first button in the toolbar on top of the Arduino IDE screen (“Verify”). It should say “Done compiling” in the bottom after a while. If the bottom becomes Orange, it means compilation has failed. You probably made a mistake following the Gamebuino installation guide, or maybe you copy pasted the sample code wrong?
Start Visual Studio and install the “Arduino IDE for Visual Studio” extension from menu Extensions > Manage Extensions
Restart Visual Studio (a short install procedure will show up and complete)
Upon restarting Visual Studio, a pop up will ask you for the Arduino IDE location. It should autodetect what it is asking for, but in case it doesn’t: the default Arduino application location is C:\Program Files (x86)\Arduino
Create a new Gamebuino Meta project in Visual Studio
Create a new project from either the startup screen or from the File menu if Visual Studio is already fully started.
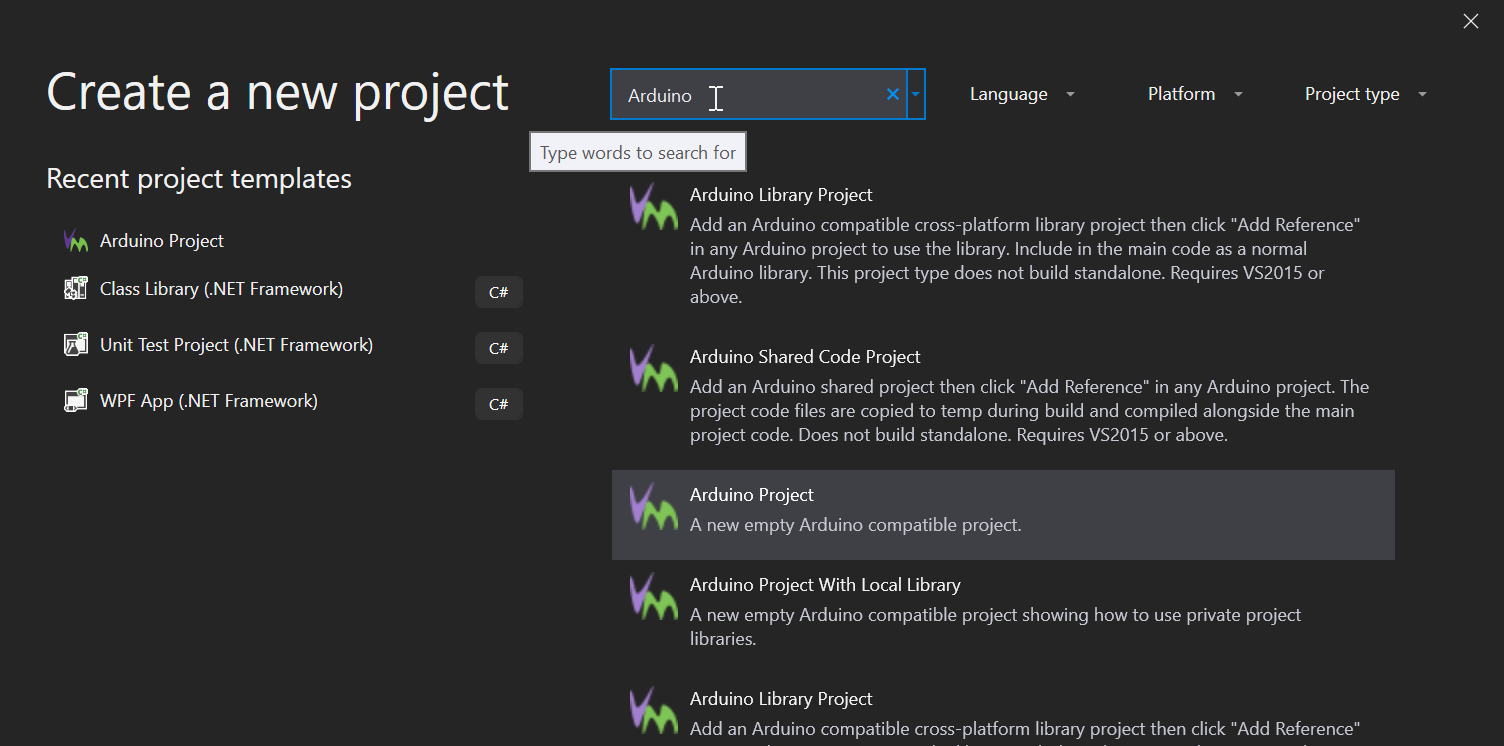
In the “Create a new project” dialog, use the search box to find the “Arduino Project” template and select it. Click Next:
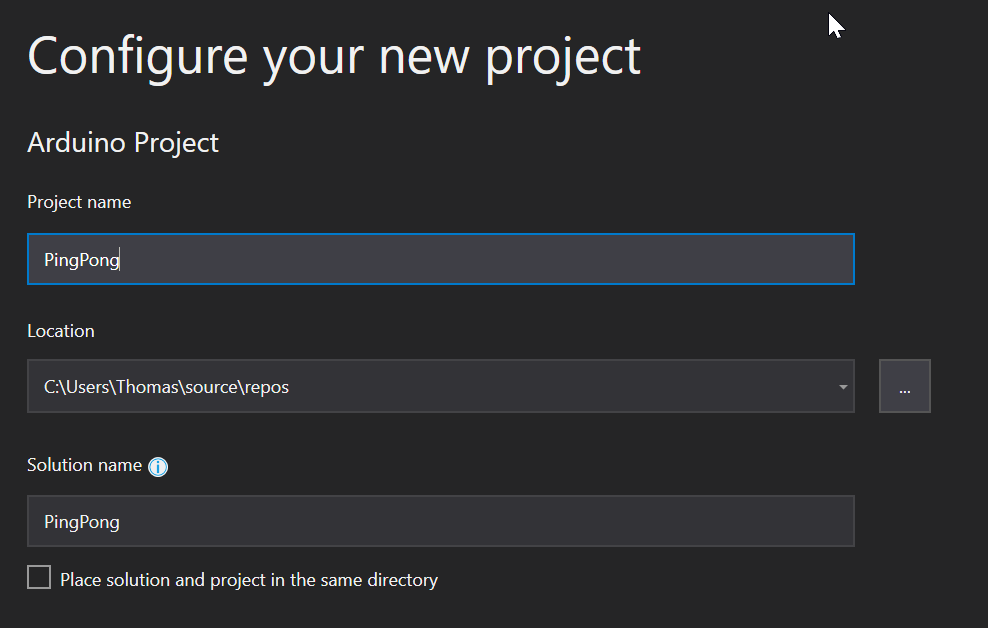
Give the project any name you like (I chose PingPong) and click Create:
Visual Studio generates and opens your new project.
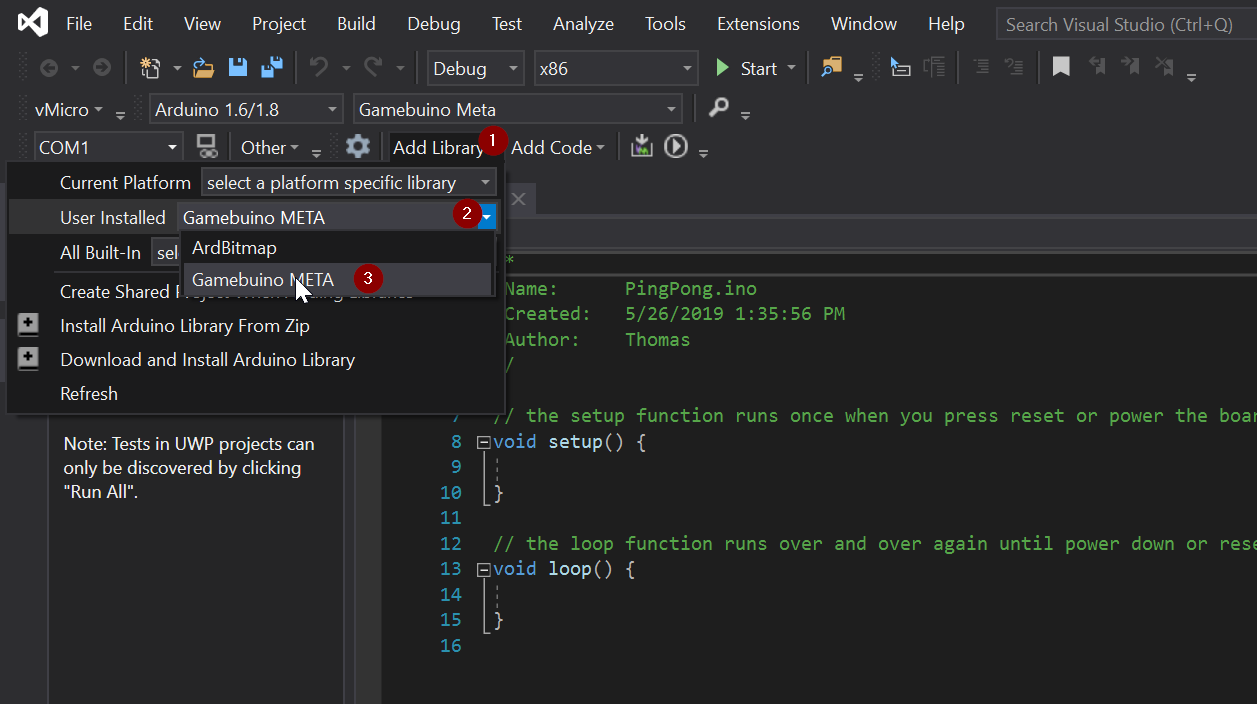
Tell Visual Studio we want to use the Gamebuino Meta library by just clicking the library from the toolbar. This may seem a bit weird, but it actually does some stuff in the background, making Visual Studio incorporate the library in its code completion etc:
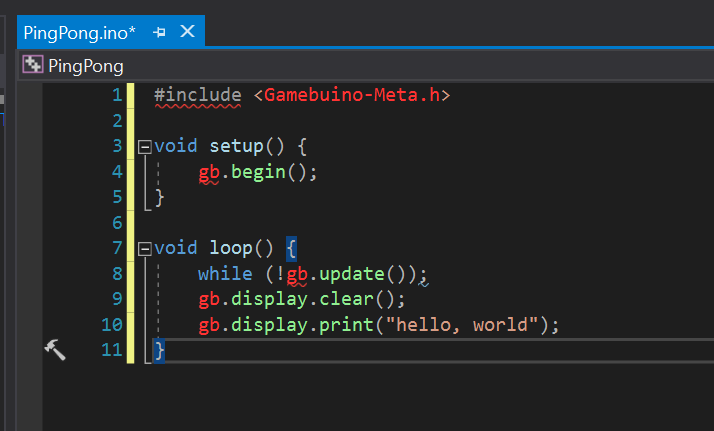
Replace the generated code in the .ino file with the sample code we used earlier in this tutorial. It may still show errors about not finding the library we added in the previous step:
To remedy this issue, unload and reload the project from the Solution Explorer to fix this small issue:
Don’t forget to reload it immediately after. (Same right-click menu…)
Visual Studio is now aware of the Gamebuino library and all errors in your code should now be gone:
Build the code (Ctrl+Shift+B or menu Build > Build Solution). You should see no errors in the Output window (bottom of Visual Studio).
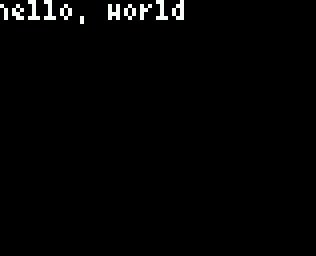
Testing the demo
By building for the Gamebuino Meta board, Visual Studio generates a .bin file which contains the compiled program, ready for use by a Gamebuino or an emulator.
You can grab the .bin file from your project’s folder. Access that folder from the Solution Explorer: right click your project’s node, as you have done before, and choose “Open Folder in File Explorer”. Go to the Debug or Release subfolder to find the .bin file. (PingPong.bin in my case).
Now, you can start programming using the full comfort of Visual Studio! For instance, by following the official tutorials at https://gamebuino.com/academy